Reading QR Codes (IF We Can)
As a teenager, I had an avid passion for ‘Choose Your Own Adventure’ books. Also known as interactive fiction (IF), these stories narrated a series of numbered scenarios in the second person, ending each short section with a choice along the lines of:
As you enter the house, you hear a loud crash. It sounds like it came from the room above.
You decide to go up the stairs to investigate. GO TO 4.
You think it would be a better idea to look around the ground floor first. GO TO 21.
The story then branches out as you explore the consequences of your choice, often leading to plot advancements and new choices, but also at times resulting in your characters untimely demise.
I would read these books over and over, exploring different paths just to discover all the different endings.
I was reminded of these stories when doing a summer course last year with a group of 15-17-year olds. Our topic was survival (subscribers to MET may remember that is a favourite classroom topic of mine from my Stories of Survival article in the January 2017 issue), and we were using a collection of short stories as the basis of the course.
The activities that accompanied the tales included discussion about how to survive in different scenarios, and I saw the connection there – an interactive survival story encouraging learners to make choices based on what we had read and talked about in class.
With no IF titles available amongst out teaching centre resources and a reader already in use, I set about crafting my own adventure story with choices along the way. Two challenges presented themselves, however: how would I create and organise the story, and how would I deliver it?
The solution was in QR codes. These would allow me to transform my story into an interactive fiction tale tailored to my students. In the remainder of this post, I will talk through how I wrote the story, how I created the QR code version and what benefits it brought to my students.
Creating an Interactive Fiction Story
This was possibly the most daunting part of the whole project – creating my own story from scratch! I am sure there are ‘choose your own adventure’ tales written for pre-intermediate teen EFL students out there, but writing my own allowed me to tailor the content in two ways: I was able to recycle language from our course pitched at their reading level; and I was able to include references to topics, ideas, and even one or two running jokes we had established in our lessons.
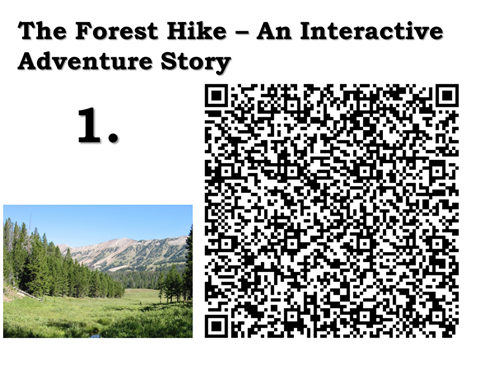
Based on our theme of survival, I wrote a story set in a forest with the reader assuming the role of a trekker (IF stories are usually written in the second person and the present tense, which made grading the language quite simple) who encounters a bear.
Most of the decisions were based on facts we had learned about dealing with wild animals from our course material. When you see the bear do you run or stand your ground? If it attacks you, do you fight back or play dead? Even after escaping the bear, my readers faced survival against the elements and had to make choices about shelter, finding drinking water, and staving off hunger.
To arrange the story, I went low-tech and utilised sticky notes. This allowed me to create a visual map of how the story was branching out and the directions it was going in. Once I was happy with the story map, it was time to type it up and create the QR codes.
Generating QR Codes
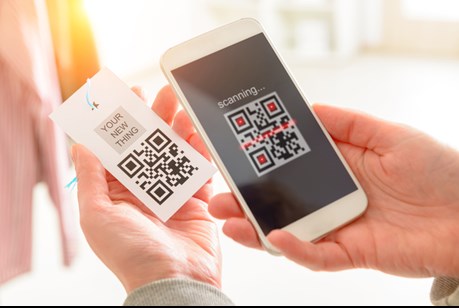
If you have not used QR codes in class before, you have most likely encountered them on product packaging, advertisements or embedded in other digital and print media. They are the pixelated black and white squares that can be scanned with an app on your phone or tablet, often to automatically link you to a website, video, or image.
But did you know, they can also be scanned to reveal a text? This feature is what I used to convert my story into a medium useable in class. This was a lot more straightforward than the planning and writing the story! I simply used an online QR code generator (easily searchable from Google), and selected the ‘text’ option. I copy/pasted my typed text over and clicked ‘create.’
I now had a QR code image representing my text, which I saved (carefully numbering each one so they did not get mixed up) before repeating with the other 47 sections of my tale.
Using the QR Codes
It was back to paper next as I printed off the codes, with a number added next to each code for reference and set up the activity in and around class. The codes were stuck to the walls in the classroom and the corridor, the students were put in pairs and presented with an iPad and we were ready to go.
I displayed the initial paragraph on the IWB for us all to read together to ensure they were familiar with the concept, and then they made their first choice and scanned the corresponding QR code. As the students had one iPad between two, this generated a buzz of discussion as they read through the text that had just appeared on their screens together, checked for common understanding, and then debated what to do next.
It was interesting to see how different pairs made different choices and it was even more interesting to hear the reasoning behind it. Some pairs went down the wrong path and had to start over, but they did so willingly, keen to progress further.
Other pairs were able to successfully survive, yet they still came back to the start to explore other options and new story paths, much as I had done with the IF novels I read all those years ago.
Why bother with QR codes at all?
This is always an important question to ask when using any aspect of technology in our classroom (or any other resource for that matter) – what benefit(s) does it offer over the alternative?
In this case, the QR codes were a major time saver. Had I printed the story out, I would have had to compile it into some kind of booklet and make enough copies for each pair of students. Doing so would have taken up even more time than scripting the story, not to mention the copious amounts of paper needed.
Furthermore, print does not lend itself well to pair work. Instead, we usually take a book and read it individually. Sharing and reading concurrently is much easier on a tablet screen, as evidenced by how my students held their iPads with one hand each and read through the text on screen together (also a reason why I used the teaching centre’s iPads and not the students’ own mobile phones).
Another alternative would have been to print each numbered paragraph as text and post them on the walls while running the activity in the same way. However, this would have resulted in large numbers of students crowding around a single printout, jostling for position to get a good view. After scanning the QR code, they had the text on their screens and were able to step away, take their time reading through, and discuss what to do next.
What to do next
As an immediate follow-up activity, I put different pairs of students together to discuss their stories and try to identify the points where their paths had split. They very much enjoyed sharing their experiences, especially all the ways they had failed to survive!
I then explained the process of scripting the story and creating the QR codes and it became a project spread over the next couple of weeks for them to make their own IF story. As mentioned earlier, the use of ‘you’ and present tenses to describe the bulk of the action made this a straightforward task for them to engage with. It also gave them an opportunity to actively use the target language from the various stories we had read and activities we had engaged in.
For me, the simple presentation of short snippets of text allowed me to easily adapt the story to different age groups and levels. I have used an altered version of the story (removing those class specific running jokes and changing keywords as necessary) with my 12-14 year-old groups as well as with higher levels.
It requires time and effort to create an IF story with QR codes but the reusability factor (both with other classes and within the same group) and the level of engagement it encourages (a classic case of students not viewing the activity as ‘reading’) make it all worthwhile.
Have you used interactive fiction with your students? Have you used QR codes in a similar way (or in a different, even better way)? If so, then please share your experiences in the comments.
Comments
Write a Comment
Comment Submitted